Pix
Pix Integration Guide for CellPoint Velocity API
This page provides a guide for integrating CellPoint Velocity API with Pix. Pix is a payment method that supports payments and transfers by those using PSPs that the Banco Central do Brasil (BCB) has authorized.
Workflow
When using Pix with CellPoint Velocity API, the workflow is as follows:
- Initialize request - While loading the checkout page, the merchant's front-end application sends an Initialize request to the Velocity API.
- Initialize response - The API returns an Initialize response containing Pix as one of the available forms of payment.
- Display payment options - The merchant application displays the available payment options, and the customer selects Pix.
- Collect information - The merchant application displays fields for the customer to enter their identification data.
- Pay request - The merchant application sends a Pay request containing information for Pix.
- Pay response - The API returns a Pay response containing URL redirect information.
- Redirect for payment completion - The merchant application redirects the customer to the URL, which displays a QR code that the customer can scan to complete their payment. When the payment is complete, CellPoint Velocity API redirects the customer to the accept URL.
Prerequisites
Work with your CellPoint Digital sales representative or account manager to sign up, set up your test account, and access your testing credentials.
Integration
Complete the following steps to use Pix with your CellPoint Velocity API integration.
1. Initialize payment
Endpoint: /mpoint/initialize-payment
Method: POST
Once the page has loaded, send a POST request to the /mpoint/initialize-payment endpoint of the CellPoint Velocity API. For more information, see our API integration guide and Initialize API reference.
Below is sample code of an Initialize request:
<?xml version="1.0" encoding="UTF-8"?>
<root>
    <initialize-payment account="101131" client-id="10101">
        <transaction order-no="TES442" type-id="1">
            <amount currency-id="170" country-id="405">29000000</amount>
            <hmac>d21ecb779a24763e3c999...</hmac>
            <orders/>
            <fees>
                <fee>2300</fee>
            </fees>
            <additional-data/>
        </transaction>
        <client-info language="en" sdk-version="2.0.0" version="2.0.0" platform="HTML5" profileid="">
            <mobile operator-id="40500" country-id="405">7676565454</mobile>
            <email>[email protected]</email>
            <customer-ref>[email protected]</customer-ref>
            <device-id>2E8667F78B23402BBFFFFFFFFFFF58D314566333</device-id>
            <ip>62.242.147.103</ip>
        </client-info>
    </initialize-payment>
</root>
If Pix is available, the Initialize response includes PIX as one of the available forms of payment. This is listed in the aggregators object, as in the code snippet below:
"aggregators": {
        "card": [
            {
                "cvc_length": "0",
                "cvcmandatory": "false",
                "dcc": "false",
                "enabled": "true",
                "id": "117",
                "installment": "0",
                "max_length": "0",
                "min_length": "0",
                "payment_type": "7",
                "preferred": "false",
                "presentment_currency": "false",
                "processor_type": "7",
                "psp_id": "-1",
                "state_id": "1",
                "type_id": "117",
                "name": "PIX",
                "prefixes": {
                    "prefix": {
                        "id": "390",
                        "min": "-1",
                        "max": "-1"
                    }
                },
                "active_payment_methods": [],
                "text": "PIX"
            }
        ]
    },
For a full sample response and parameter definitions, see Initialize in our API Reference.
2. Capture payment information
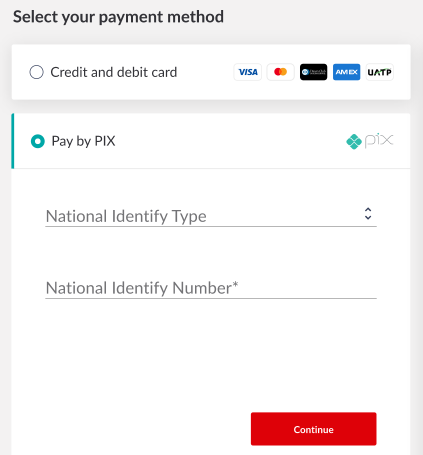
Display Pix to the customer as one of the available forms of payment. If the customer selects Pix, provide fields for them to enter the following:
- identification document type (acceptable values: CNPJ, CPF)
- identification document number
Below is an example of how you might display these options to the customer:
3. Send Pay request
Endpoint: /mpoint/pay
Method: POST
Send a POST request to the /mpoint/pay endpoint of the CellPoint Velocity API. For more information, see our API integration guide and Pay API reference.
In the request, include the following key-value pairs in additional-data:
- key:
hpp_pay_remaining_time; value:1786(This is the payment page's session in seconds; it will appear as a timer in the redirect URL.) - key:
tax_id_type; value: the customer-provided document type (CNPJorCPF) - key:
tax_id; value: the customer-provided document number
See the example payload below:
<?xml version="1.0" encoding="UTF-8"?>
<root>
    <pay account="101012" client-id="10101">
        <transaction store-card="false" id="80948190">
            <card type-id="117">
                <amount country-id="403" currency-id="986" >35908</amount>
            </card>
            <hmac>027cfd8651f40041a66f</hmac>
            <additional-data>
                <param name="hpp_pay_remaining_time">1786</param>
                <param name="tax_id_type">CNPJ</param>
                <param name="tax_id">12345</param>
            </additional-data>
        </transaction>
        <client-info language="en" sdk-version="2.0.0" version="2.0.0" platform="HTML5" >
            <mobile operator-id="40500" country-id="405">56456456</mobile>
            <email>[email protected]</email>
            <ip>179.14.228.191</ip>
        </client-info>
    </pay>
</root>
For parameter definitions and more information about the Pay response, see Pay in our API Reference.
4. Redirect customer
The API returns a Pay response containing a CellPoint Digital URL in the text content of url. Extract this URL and redirect the customer to it.
See the sample code for a Pay response below:
<?xml version="1.0" encoding="UTF-8"?>
<root>
	<psp-info id="53" merchant-account="68e8f368-8c9d-46f5-a1c4-576d7ed1ba00" type="7">
		<url content-type="application/x-www-form-urlencoded" method="POST" type-id="11">https://av.uat-01.cellpointmobile.net/mpoint/aggregator/payu/qr-redirect</url>
		<hidden-fields>
			<expiration_time>1786</expiration_time>
			<qrcode_image>iVBORw0KGgoAAAANSUhEUg...</qrcode_image>
			<transaction_id>80948190</transaction_id>
			<amount>359.08</amount>
			<currency>BRL</currency>
			<paymentid>13fcd7e4-ffcb-475b-94ca-f69b7141331f</paymentid>
		</hidden-fields>
		<accept-url>https://av.uat-01.cellpointmobile.net/mpoint/aggregator/payu/redirect</accept-url>
		<name>card_holderName</name>
		<auth-token>Auth-Token</auth-token>
		<message language="en"/>
	</psp-info>
	<status code="1041">Payment Pending</status>
</root>
The redirect URL displays a QR code and a timer for the transaction's completion, as shown below:
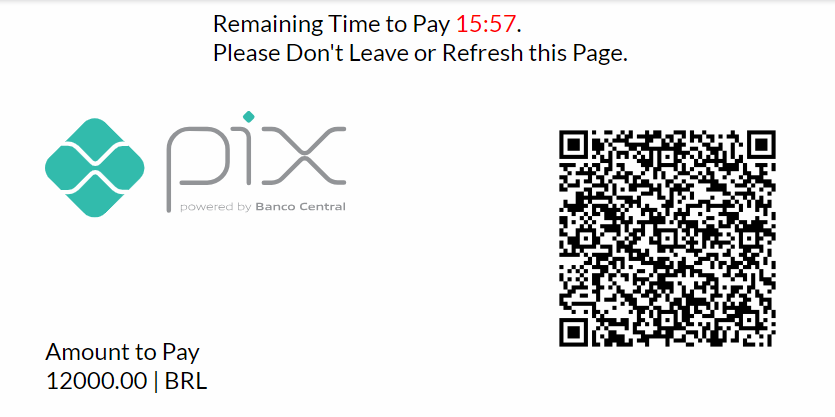
The customer uses the QR code to complete their payment on their phone through Pix.
When the payment is completed, CellPoint Digital receives the final transaction from the PSP (PayU) and redirects the customer to your designated accept URL.
Updated 9 months ago