Google Pay™
This page provides a guide to integrating Google Pay with CellPoint Velocity API, which lets a customer use a payment method saved to their Google Pay account.
Onboarding Checklist
The following table shows the onboarding responsibilities belonging to CellPoint Digital, Google, and you the merchant:
| Owner | Owner Responsibilities | Details |
|---|---|---|
| CellPoint Digital | • Client onboarding and configuration • Merchant onboarding with Google | • Client setup - account and clientid • API authorization credentials • Configure redirect URLs for successful and failed transactions • API version • Supported country-id list • Gateway ID: cellpointmobile |
| Merchant / Google | Production validation by Google | • Merchant to contact Google for validation of the integration • Obtain merchantid from Google after validation Follow the link to request production access. |
Google Pay Requirements
Before you start integration, you must follow the Google Web Integration checklist and brand guidelines as follows:
Workflow
When using Google Pay with CellPoint Velocity API, the workflow is as follows:
- The customer navigates to the merchant's payment/checkout page.
- While loading the checkout page, the merchant sends an Initialize request.
- The API returns an Initialize response with information for Google Pay.
- The merchant loads information from the Initialize response into the page’s HTML during page load.
- When the customer selects the Google Pay button, Google sends payment data to the merchant.
- The merchant uses the received payment data to send an Authorize request.
- The API returns a successful Authorize response, which confirms the success of the payment.
Integration
Complete the following steps to use Google Pay with your integration.
1. Initialize a payment
Endpoint: /mpoint/initialize-payment
Method: POST
Once the page has loaded, send a POST request to the /mpoint/initialize-payment endpoint of the CellPoint Digital API. For more information, see Initialize Payment in the API Reference section of this site.
The code below is an example Initialize Payment request body:
<?xml version="1.0" encoding="UTF-8"?>
<root>
	<initialize-payment account="[integer]" client-id="[integer]">
		<transaction order-no="CPM1601976034055" type-id="[integer]" >
			<amount currency-id="[integer]" countryid="[integer]">100</amount>
		</transaction>
		<client-info language="en" app-version="1.43" sdk-version="1.43" version="1.43" platform="HTML5">
			<mobile operator-id="[integer]" country-id="200">[mobile number]</mobile>
			<email>[email]</email>
			<customer-ref>[customer-ref]</customer-ref>
		</client-info>
	</initialize-payment>
</root>
Below is a sample Initialize Payment response when using Google Pay. Note that, in root: wallets: card: name, the text content is set to Google Pay.
<?xml version="1.0" encoding="UTF-8"?>
<root>
<client-config account="[integer]" auto-capture="false" id="[integer]" mode="[integer]" store-card="[integer]">
<name>Test</name>
<callback-url>[merchant URL for callback]</callback-url>
<accept-url/>
</client-config>
<transaction auto-capture="true" eua-id="[integer]" id="[integer]" language="en" mode="1" order-no="" type-id="[integer]">
<amount country-id="[integer]" currency="DKK" format="{PRICE} {CURRENCY}" symbol="">10025</amount>
<mobile country-id="[integer]" operator-id="[integer]">30206172</mobile>
<callback-url>[CALLBACK URL]</callback-url>
<accept-url/>
</transaction>
<session id="6143" total-amount="1" type="1">
<amount alpha2code="US" alpha3code="USA" code="840" country-id="200" currency="" currency-id="0" format="{CURRENCY}{PRICE}" symbol="$">10025</amount>
</session>
<wallets>
<card cvc-length="-1" cvcmandatory="false" dcc="false" enabled="true" id="41" installment="0" max-length="-1" min-length="-1" payment-type="3" preferred="false" presentment-currency="false" processor-type="3" psp-id="-1" state-id="1" type-id="41">
<name>Google Pay</name>
<prefixes>
<prefix id="200">
<min>-1</min>
<max>-1</max>
</prefix>
<prefix id="202">
<min>-1</min>
<max>-1</max>
</prefix>
</prefixes>
<url method="overlay"/>
<head><script>var baseRequest={apiVersion: 2, apiVersionMinor: 0 };var allowedCardAuthMethods=['PAN_ONLY','CRYPTOGRAM_3DS'];var allowedCardNetworks=['MASTERCARD','DISCOVER','VISA','AMEX'];var assuranceDetailsRequired=true;var tokenizationSpecification={type:'PAYMENT_GATEWAY',parameters:{'gateway':'cellpointmobile','gatewayMerchantId':'10106'}};var baseCardPaymentMethod={type:'CARD',parameters:{allowedAuthMethods:allowedCardAuthMethods,allowedCardNetworks:allowedCardNetworks,assuranceDetailsRequired:assuranceDetailsRequired}};var cardPaymentMethod=Object.assign({},baseCardPaymentMethod,{tokenizationSpecification:tokenizationSpecification});let paymentsClient=null;function getGoogleIsReadyToPayRequest(){return Object.assign({},baseRequest,{allowedPaymentMethods:[baseCardPaymentMethod]})} function getGooglePaymentDataRequest(){var paymentDataRequest=Object.assign({},baseRequest);paymentDataRequest.allowedPaymentMethods=[cardPaymentMethod];paymentDataRequest.transactionInfo=getGoogleTransactionInfo();paymentDataRequest.merchantInfo={ merchantName:'Virgin Holidays'};return paymentDataRequest} function getGooglePaymentsClient(){if(paymentsClient===null){return(new google.payments.api.PaymentsClient({environment:'TEST'}));}} function getGoogleTransactionInfo(){return{countryCode:'GB',currencyCode:'GBP',totalPriceStatus:'FINAL',totalPrice:'152.00'}}</head>
<body><script async="true" src="https://myurl/js/googlepay.js"></script> <script async="true" src="https://pay.google.com/gp/p/js/pay.js"></script></body>
<auth-token>Auth-Token</auth-token>
</card>
</wallets>
</root>
{
    "cvc_length": "-1",
    "cvcmandatory": "false",
    "dcc": "false",
    "enabled": "true",
    "id": "41",
    "installment": "0",
    "max_length": "-1",
    "min_length": "-1",
    "payment_type": "3",
    "preferred": "false",
    "presentment_currency": "false",
    "processor_type": "3",
    "psp_id": "-1",
    "state_id": "1",
    "type_id": "41",
    "name": "Google Pay",
    "prefixes": {
        "prefix": [
            {
                "id": "200",
                "min": "-1",
                "max": "-1"
            },
            {
                "id": "202",
                "min": "-1",
                "max": "-1"
            }
        ]
    },
    "url": {
        "method": "overlay"
    },
    "head": "<script>var baseRequest={apiVersion: 2, apiVersionMinor: 0 };var allowedCardAuthMethods=[\"PAN_ONLY\",\"CRYPTOGRAM_3DS\"];var allowedCardNetworks=[\"MASTERCARD\",\"DISCOVER\",\"AMEX\",\"VISA\"];var assuranceDetailsRequired=true;var tokenizationSpecification={type:\"PAYMENT_GATEWAY\",parameters:{\"gateway\":\"cellpointmobile\",\"gatewayMerchantId\":\"10106\"}};var baseCardPaymentMethod={type:\"CARD\",parameters:{allowedAuthMethods:allowedCardAuthMethods,allowedCardNetworks:allowedCardNetworks,assuranceDetailsRequired:assuranceDetailsRequired}};var cardPaymentMethod=Object.assign({},baseCardPaymentMethod,{tokenizationSpecification:tokenizationSpecification});let paymentsClient=null;function getGoogleIsReadyToPayRequest(){return Object.assign({},baseRequest,{allowedPaymentMethods:[baseCardPaymentMethod]})} function getGooglePaymentDataRequest(){var paymentDataRequest=Object.assign({},baseRequest);paymentDataRequest.allowedPaymentMethods=[cardPaymentMethod];paymentDataRequest.transactionInfo=getGoogleTransactionInfo();paymentDataRequest.merchantInfo={ merchantName:\"Virgin Holidays\"};return paymentDataRequest} function getGooglePaymentsClient(){if(paymentsClient===null){return(new google.payments.api.PaymentsClient({environment:\"TEST\"}));}} function getGoogleTransactionInfo(){return{countryCode:\"GB\",currencyCode:\"USD\",totalPriceStatus:\"FINAL\",totalPrice:\"152.00\"}}",
    "body": "<script async='true' src='https://storage.googleapis.com/bkt-cp-sit-ehpp2/10106/js/googlepay.js'></script> <script async='true' src='https://pay.google.com/gp/p/js/pay.js'></script>",
    "auth_token": "Auth-Token",
    "text": "Google Pay"
}
<?xml version="1.0" encoding="UTF-8"?>
<root>
	<client-config account="[integer]" auto-capture="false" id="[integer]" mode="[integer]" store-card="[integer]">
		<name>Test</name>
		<callback-url>[merchant URL for callback]</callback-url>
		<accept-url/>
	</client-config>
	<transaction auto-capture="true" eua-id="[integer]" id="[integer]" language="en" mode="1" order-no="" type-id="[integer]">
		<amount country-id="[integer]" currency="DKK" format="{PRICE} {CURRENCY}" symbol="">10025</amount>
		<mobile country-id="[integer]" operator-id="[integer]">30206172</mobile>
		<callback-url>[CALLBACK URL]</callback-url>
		<accept-url/>
	</transaction>
	<session id="6143" total-amount="1" type="1">
		<amount alpha2code="US" alpha3code="USA" code="840" country-id="200" currency="" currency-id="0" format="{CURRENCY}{PRICE}" symbol="$">10025</amount>
	</session>
	<wallets>
		<card cvc-length="-1" cvcmandatory="true" dcc="false" enabled="true" id="[Google Pay wallet type Id]" installment="0" max-length="-1" min-length="-1" payment-type="3" preferred="false" processor-type="3" psp-id="[ACQ ID]" state-id="1" type-id="[Google Pay wallet type Id]">
			<name>Google Pay</name>
			<prefixes>
				<prefix>
					<min>-1</min>
					<max>-1</max>
				</prefix>
				<prefix>
					<min>-1</min>
					<max>-1</max>
				</prefix>
			</prefixes>
			<url method="overlay"/>
			<hidden-fields>
				<card-brands>'VISA','MASTERCARD'</card-brands>
				<merchant-request-id>[transaction-id]</merchant-request-id>
				<gatewayMerchantId>[merchant-id]</gatewayMerchantId>
				<gateway>cellpointmobile</gateway>
				<tokenizationType>PAYMENT_GATEWAY</tokenizationType>
				<currency-code>PHP</currency-code>
				<amount>11232.00</amount>
				<environment>TEST</environment>
				<mode>1</mode>
				<payment-methods>'PAN_ONLY'</payment-methods>
				<countryCode>PH</countryCode>
				<merchantName>[Merchant Name]</merchantName>
			</hidden-fields>
			<return-url>[return url]</return-url>
        </card>
	</wallets>
</root>
The following fields in this Initialize Payment response are required to process this response on the web (in step 2 of this guide):
| Field | Format | Parents | Description |
|---|---|---|---|
head | String | root: wallets: card | You will use the entire contents of the head tag in your payment page. |
body | String | root: wallets: card | You will separate the contents of body into these two parts, and you will include each in its own script element:• a Google Pay script • A JavaScript snippet The JS snippet helps to display the Google Pay button and eventually trigger Google Pay payment. |
The following fields in this Initialize Payment response are required to call /mpoint/authorize (in step 4 of this guide):
| Field | Format | Parents | Description |
|---|---|---|---|
id | Positive Integer | root: transaction | A unique transaction ID generated for the Initialize Payment request. This identifies a transaction within CellPoint Digital's systems. |
type-id | Positive Integer | root: wallets: card | A unique ID that identifies the payment methods configured. type-id = 41 indicates the internal ID defined for Google Pay payment method. |
2. Add the initialization information to your page
To process the initialize response on the web, parse the Initialize Payment response and capture the contents of the <head> and <body> elements. Add the scripts to the <head> and <body> elements of your website as shown in the example below:
<!DOCTYPE html>
<html lang="en">
  <head>
    <script>var baseRequest={apiVersion: 2, apiVersionMinor: 0 };var allowedCardAuthMethods=['PAN_ONLY','CRYPTOGRAM_3DS'];var allowedCardNetworks=['MASTERCARD','DISCOVER','AMEX','VISA'];var assuranceDetailsRequired=true;var tokenizationSpecification={type:'PAYMENT_GATEWAY',parameters:{'gateway':'cellpointmobile','gatewayMerchantId':'10106'}};var baseCardPaymentMethod={type:'CARD',parameters:{allowedAuthMethods:allowedCardAuthMethods,allowedCardNetworks:allowedCardNetworks,assuranceDetailsRequired:assuranceDetailsRequired}};var cardPaymentMethod=Object.assign({},baseCardPaymentMethod,{tokenizationSpecification:tokenizationSpecification});let paymentsClient=null;function getGoogleIsReadyToPayRequest(){return Object.assign({},baseRequest,{allowedPaymentMethods:[baseCardPaymentMethod]})} function getGooglePaymentDataRequest(){var paymentDataRequest=Object.assign({},baseRequest);paymentDataRequest.allowedPaymentMethods=[cardPaymentMethod];paymentDataRequest.transactionInfo=getGoogleTransactionInfo();paymentDataRequest.merchantInfo={ merchantName:'Virgin Holidays'};return paymentDataRequest} function getGooglePaymentsClient(){if(paymentsClient===null){return(new google.payments.api.PaymentsClient({environment:'TEST'}));}} function getGoogleTransactionInfo(){return{countryCode:'GB',currencyCode:'USD',totalPriceStatus:'FINAL',totalPrice:'152.00'}}</script>
  </head>
  <body>
    <script async="true" src="https://pay.google.com/gp/p/js/pay.js"></script>
    <script async="true" src="https://storage.googleapis.com/bkt-cp-sit-ehpp2/10106/js/googlepay.js"></script>
  </body>
</html>
The script in the head element sets certain options relevant to your Google Pay configuration. You will call functions from the two scripts in body to send transaction data.
3. Add the Google Pay button to your page
3a. Add a <div> container for the Google Pay button and assign it an id
<div> container for the Google Pay button and assign it an idTo display a Google Pay button on your page, add <div id=gpay-container-id /> to the page’s HTML. Assign a value to the id attribute of the <div> element. You will reference the id value in subsequent steps.
3b. Create an addGooglePayButton function
addGooglePayButton functionWrite a function that configures the Google Pay button. The addGooglePayButton() function must accept the button container ID (gpay-container-id) and the name of your paymentCallback function as parameters, as shown in the example below:
function addGooglePayButton (gpay-container-id, paymentCallback) {
	const paymentsClient = getGooglePaymentsClient();
	const button =
		paymentsClient.createButton({
		buttonColor: 'default',
		buttonType: 'buy',
		onClick: () => onGooglePaymentButtonClicked(paymentCallback) });
	container.appendChild(button);
}
The addGooglePayButton() function should perform the following actions:
- Call the
getGooglePaymentsClient()function. - Set the values of these
createButtonproperties:buttonColorandbuttonType. - Use the
onClick()event to call the theonGooglePaymentButtonClicked()function with the name of yourpaymentCallbackfunction as a parameter. TheonGooglePaymentButtonClicked()function is part of the CellPoint Digital Google Pay Javascript library, which you included in step 2.
The paymentCallback function accepts four parameters: paymentToken, paymentNetwork, preauthenticated, and billingAddress. CellPoint Digital will call the paymentCallback function to send you transaction details that CellPoint Digital receives from Google. See step 4 for details.
3c. Call the addGooglePayButton function
addGooglePayButton functionOn the onLoad event, call the addGooglePayButton() function with gpay-container-id and the name of your callback function as parameter, as shown in the sample code below:
<body>
  <div id={gpay-container-id} /}>
    <script>
    	function onLoad{window.addGooglePayButton(gpay-container-id, paymentCallback )}
    </script>
</body>
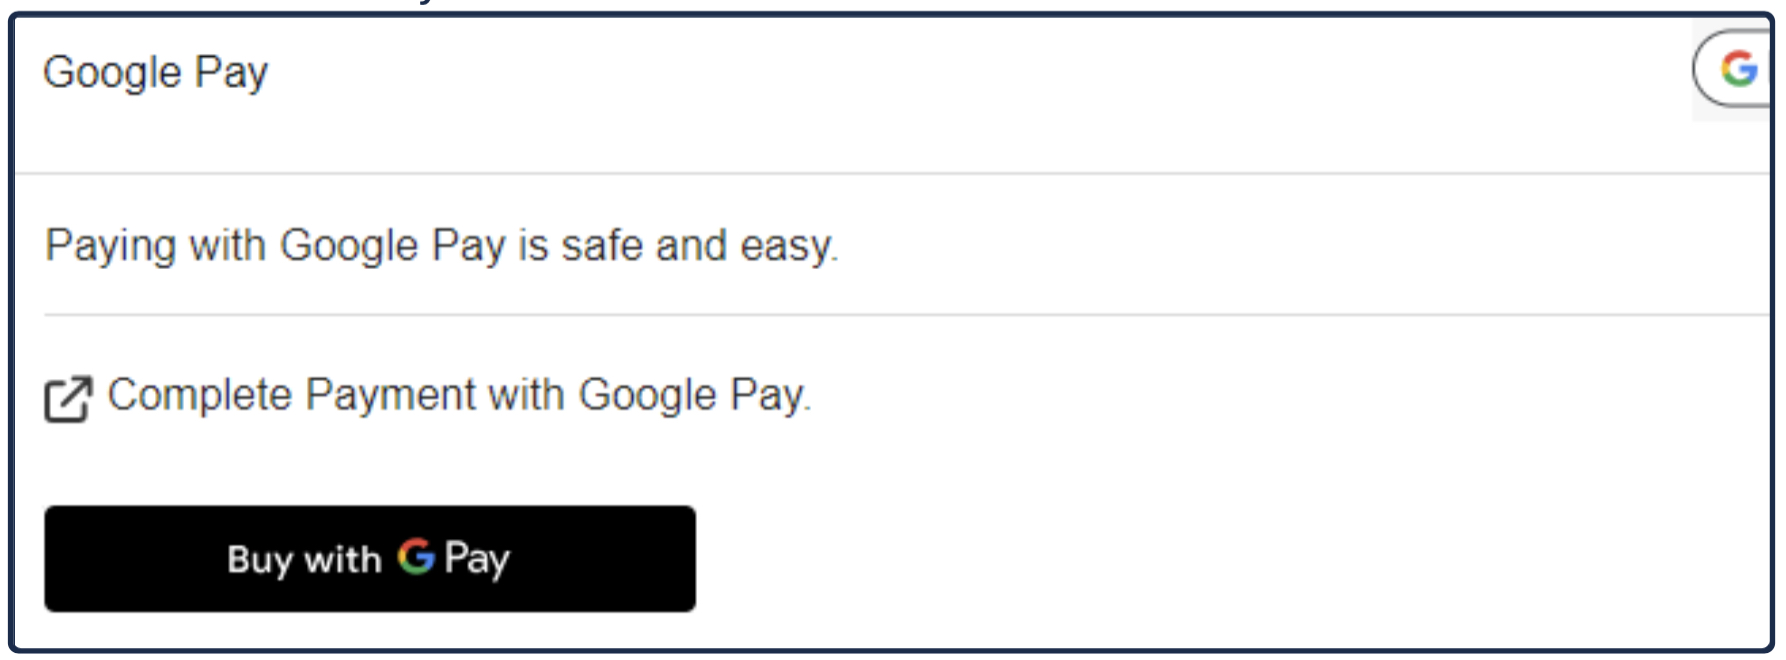
Calling addGooglePayButton() adds a functioning Google Pay button to your page as shown below:
4. Send an Authorize request to the CellPoint Digital API
Endpoint: /mpoint/authorize-payment
Method: POST
When the customer clicks the Google Pay button, the application calls the function onGooglePaymentButtonClicked(), and CellPoint Digital returns Google Pay data to the paymentCallback() function that you specified previously.
Write a paymentCallback() function that sends a POST request to the /mpoint/authorize-payment endpoint of the CellPoint Digital API with the paymentToken, paymentNetwork, preauthenticated, and billingAddress data in the body of the request. Below is an example of what this might look like:
function paymentCallback(paymentToken, paymentNetwork, preauthenticated, billingAddress) {
    const url = "https://your-api.com/authorize";

    const data = {
        cardtypeid: "GPAY_WALLET",
        token: paymentToken,
        network: paymentNetwork.toLowerCase(),
        preauthenticated: String(preauthenticated).toLowerCase(),
        billingInfo: billingAddress || ""
    };

    fetch(url, {
        method: 'POST',
        headers: {
            'Content-Type': 'application/json',
        },
        body: JSON.stringify(data)
    })
    .then(response => response.json())
    .then(data => {
        console.log('Payment Authorization Successful:', data);
    })
    .catch(error => {
        console.error('Error:', error);
    });
}
The example below shows a sample body of an Authorize request. It should include the transaction: id and card: type-id data from the Initialize Payment response:
<?xml version="1.0" encoding="UTF-8"?>
<root>
	<authorize-payment account="[integer]" client-id="[integer]">
		<transaction type-id="[integer]" id="[integer]" store-card="false"  >
			<card  type-id="41" network="visa">
				<amount country-id="[integer]" currency-id="[integer]" >100</amount>
				<token>eyJzaWduYXR1cmUiOiJNRVlDSVFEK1BndVJMeWYrZTRsOGp3UW9DWUwza1pyN0NNZ3dnaDZYdmRHQmtWYnNMd0loQUt6ZkdrZm1kc3NmaVY3b1BuSzU4Rk94c0JBNTVNQVRVbDB2ODZqcDR3QnYiLCJwcm90b2NvbFZlcnNpb24iOiJFQ3YxIiwic2lnbmVkTWVzc2FnZSI6IntcImVuY3J5cHRlZE1lc3NhZ2VcIjpcImdaalpLZzdwdjcxOTM5V3htZEZDRmpPRDU3QlVuZWV5TGJJdUFvOTQxcXBFNFE4SEZoQTNyNzF4RUpyQnFvU2hQUS9KcUlFdW9KSThUU2ExWGF2RE1TK3dpSURTcTg4cG9QcjlFVDBqSWQ2Ukl5b0xYQlVzMTZNYkM5cmljdU9rdGY3NGRTNDJpd2YyZHY3QkhTQmZhUDdkK1laU2V0Y0F1Y2FicmY5RWliam8wUVN4YndKVHdodjlNK0dUK3lXUlZpdFNlbE80L1JZYUkvUWxkUGtINGZISmUzalorSEpnS0RMQ0NOSmtZaXR0SHNUak5mSy9LdThHeCtEM3pTT1ZuUmF3YVd5SFVkdkFHVW90aFJWUG1VSlhpWHZFZVYveTZZaUNzZzJKVlF4b1dzOWNYWitGNTFnUGpUSGY4WFhib3FpMmNnSXBMM3ZVRW1DTjU5TFV4Uzh0MVMzQThzRHhVUU5nQUttUzNWUmlVZnVmQXNHYW5GZnlQcnNtK0w0cVV4eTF0ajdXZjBoc0ZlcHF2NWNMbkpMNEZhSmpxNzFsMkpBNTZwRXhPcFdmR2MyMkFRc2hldk9YOHNrcDM3RmxcIixcImVwaGVtZXJhbFB1YmxpY0tleVwiOlwiQkw0amJqallWalRSdHNySnpLRWR0TUwvajNEalNiZm9JUGhxOGdGRGdkY05HclUzcHViMUg3YXVkZURMV0g2TVJJUFgrT2lybzJ0eUZiMkRwWWpyZ3FjXFx1MDAzZFwiLFwidGFnXCI6XCJocFVyaXN0TkpsTkhITDJxUkdVRm5kQmFsaVdzMVpKemc5RitiMFpEbW8wXFx1MDAzZFwifSJ9</token>
				<pre_authenticated>false</pre_authenticated>
			</card>
			<hmac>ab600de0561ffb023c94e17a7758d4bf3e936fc0104d27c13c31ccf2bba85a78202df3bd5b1160adb3b7bdfd2a2e0b2fad602a8a3272dbb8417d506ac8e82739</hmac>
		</transaction>
		<auth-token>success</auth-token>
		<client-info language="en" sdk-version="1.43" version="1.43" platform="HTML5" profileid="[profile-id]" >
			<mobile operator-id="[integer]" country-id="[integer]">[mobile-number]</mobile>
			<email>[email]</email>
			<customer-ref>[customer-ref]</customer-ref>
			<ip>223.233.86.236</ip>
		</client-info>
	</authorize-payment>
</root>
See Authorize Payment in the API Reference section of this site for more information about this request.
5. Confirm success
For Google Pay, you may receive one of two types of response. This depends on the data from the Google Pay wallet.
Response: Case 1
The CellPoint Velocity server sends the response informing if the transaction authorization was a success or a failure. The example below shows a sample Authorize success response:
<?xml version="1.0" encoding="UTF-8"?>
<root>
	<status code="2000" sub-code="2000101">Payment authorized</status>
</root>
See Authorize Payment in the API Reference section of this site for more information about this response.
Response: Case 2
In some cases, you may receive the parse challenge from the provider, where the user must complete the parsed challenge to complete the transaction.
Google Pay is a trademark of Google LLC.
Updated 24 days ago