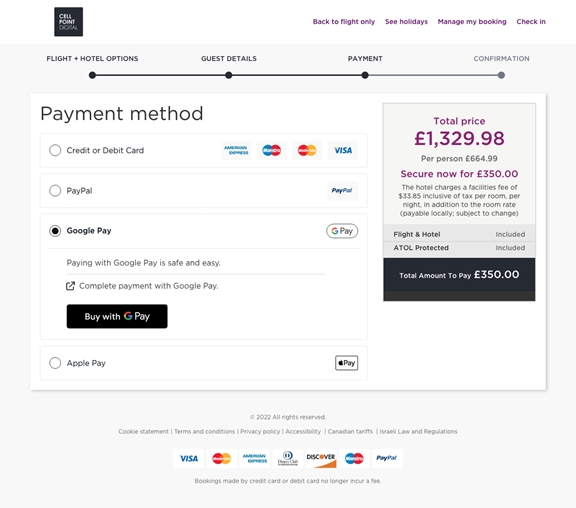
Display Google Pay Button
This page provides information about processing a response when integrating Google Pay with Velocity API. To ensure seamless Google Pay configuration with your web or mobile browser, you need to process the response that you receive from the Velocity server.
Process Initialize Response on the Web
To process the initialize response on the web, complete the following steps:
- After you receive the response for
/mpoint/initialize-payment, check if it contains the following for Google Pay support:- The
<card>object with id = 41, in the<wallets>array section - You will get the head tag in the Google Pay response use all the content(script) from that tag and add that script your payment page.
- The
<body>tag contains a Google Pay script as well as additional scripts which must be loaded when the page loads. - A JS snippet in
<script>element. Make this content available in the resulting web page.
- The
Note: The JS snippet helps to display the Google Pay Button and eventually trigger Google Pay payment.
- To display the Google Pay logo, add the following HTML div node with attribute
wallet-id=”41”
at an appropriate position in the resulting HTML.<div wallet-id="41"> <div /> </div> - Add both the body and the head script received in the card element to the head of the HTML page.
- After adding the script to the head of HTML page, handle a callback method after the Google Pay UI interaction is complete. This callback method captures the card token generated by Google Pay.
Sample Checkout Page for a Web Channel
Sample Checkout Page for an Application
When the user clicks on the payment page, it opens to the Google Pay overlay, which displays the login page to authenticate the user to perform payment.
We need to implement the below two method process to handle the callback receive from the Google Pay wallet, which gives the Successful or Failure Callback to the portal.
onWalletProcess (Payment, Network)
The onWalletProcess (payment, network) function is called every time your customer selects a card from Google Pay wallet. Implement this function as shown in the following sample code:
var selectedPayment={};
window.onWalletProcess = (payment, network) => {
  selectedPayment.token = payment.authorization_token;
  selectedPayment.network = network.toLowerCase();
}

// Data in the selectedPayment variable is used in authorize-payment request for getting token and network.
onWalletFailureCallback(err)
To handle the payment failure form for Google Pay API, implement the onWalletFailure method.
It contains an error argument to, which shows the reason of payment failure from Google Pay API.
Note: For the UI branding guidelines, please follow the Google page, which helps the user follow the page https://developers.google.com/pay/api/web/guides/ux-best-practices.
Process Pay Response
You can skip this call as you are not required call /mpoint/pay for Google Pay.
Process Response of a Customer's Google Pay Card Selection on the Web
After your customer selects a card from the Google Pay wallet, the control comes back to the HTML page. After you receive the callback, the payment process is at a stage where the user has selected the card and Google Pay has passed the token back on to the page. Use this token and complete the payment in the following manner:
- Construct the
/mpoint/authorize-paymentrequest according to the Authorize Payment guide in API Reference. - Pass the token that you receive in
"SelectedPayment.token"as a"token"element in theauthorize-paymentrequest.
Updated 3 months ago